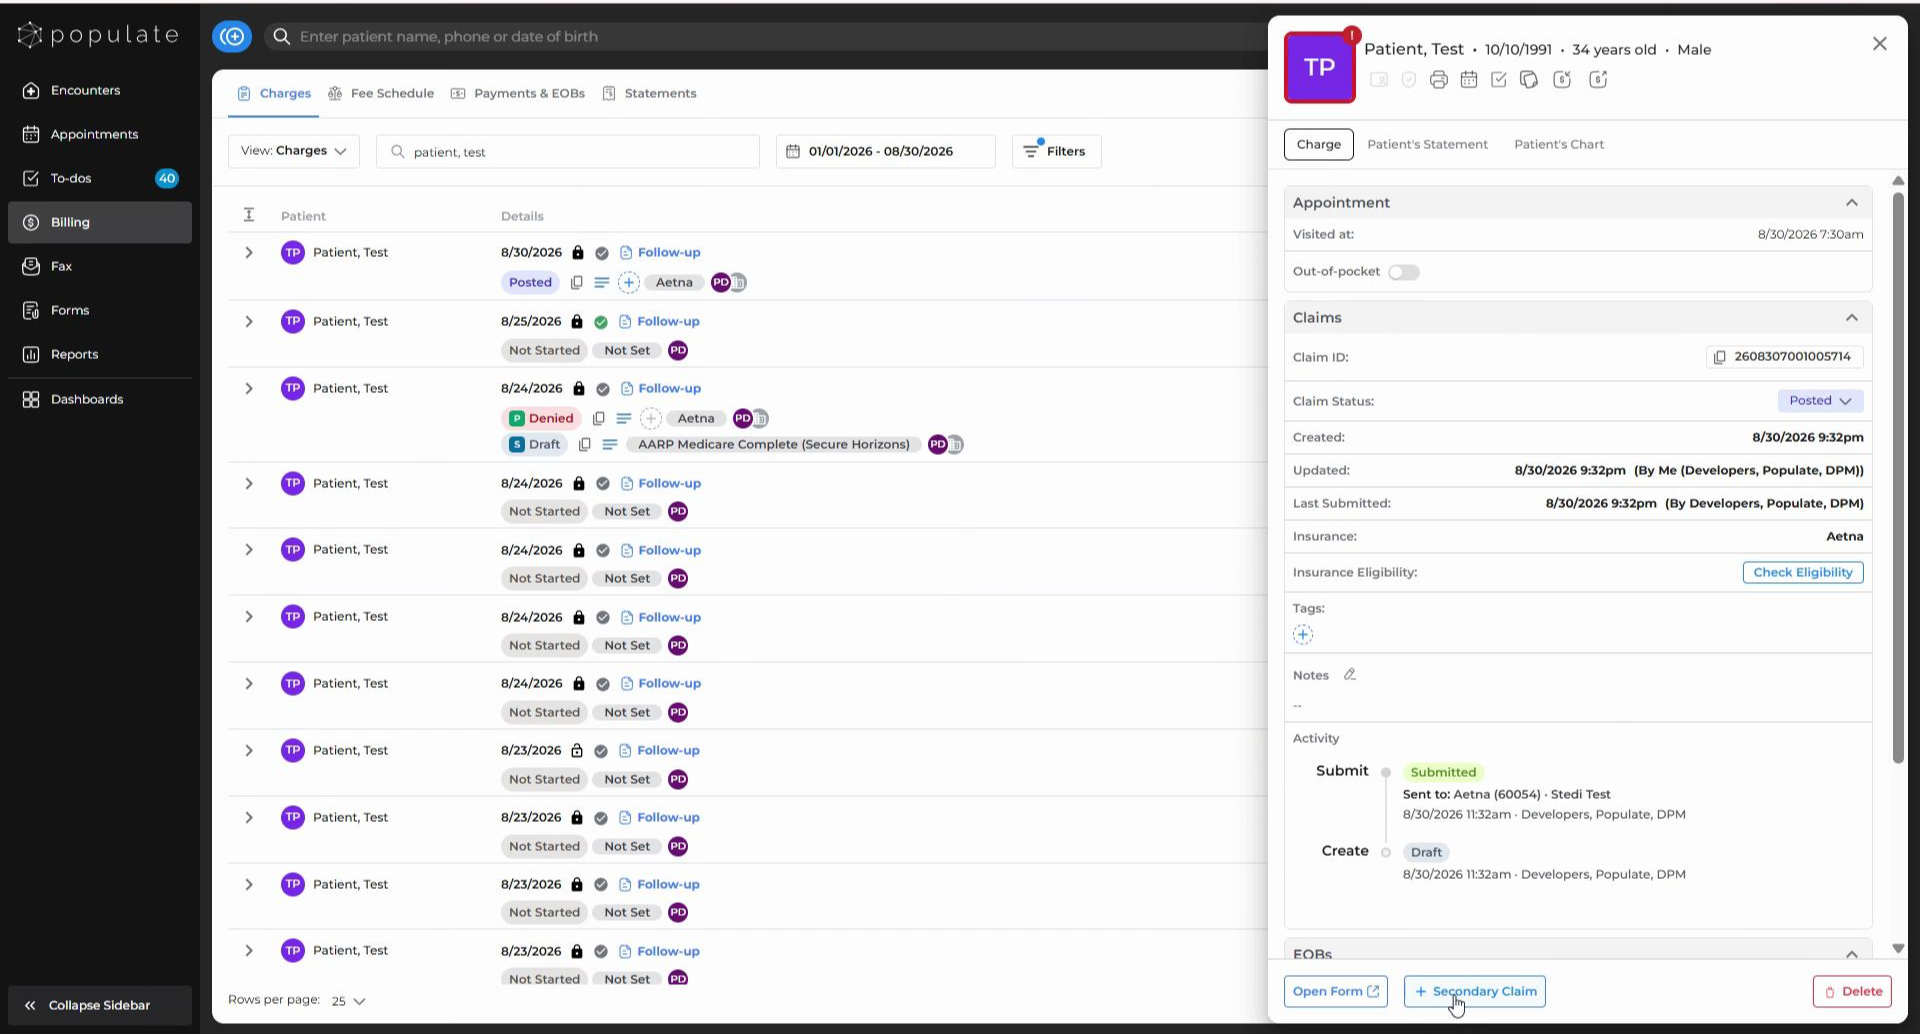
Navigate to the “Charges” tab under Billing. Click on the charge for which you need to create a secondary claim. Once the side panel opens, look for the options at the bottom right. You’ll see both a “+Secondary Claim” button next to the "Open Form” button. To create a secondary claim directly, click on “+Secondary Claim”.
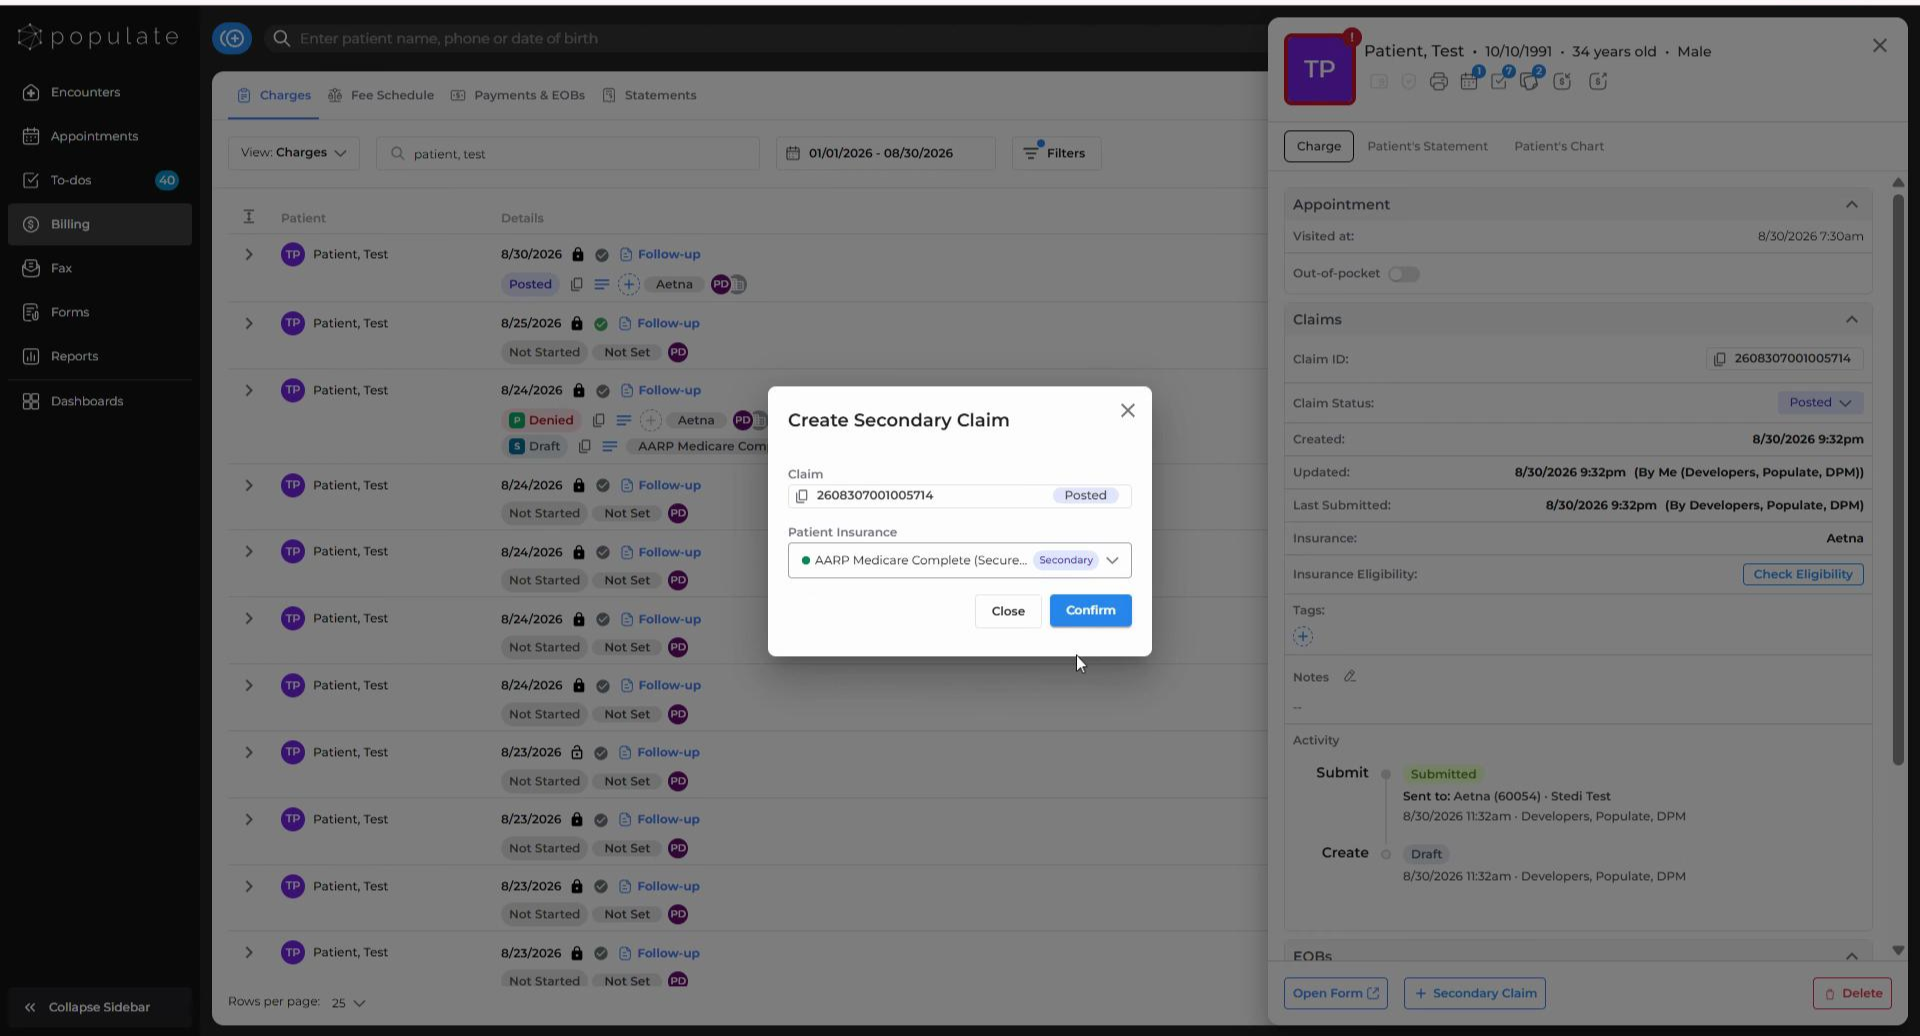
A dialog will appear where you can select the appropriate insurance from the list of all active insurances for the patient, then click “Confirm”. The secondary claim will be created.
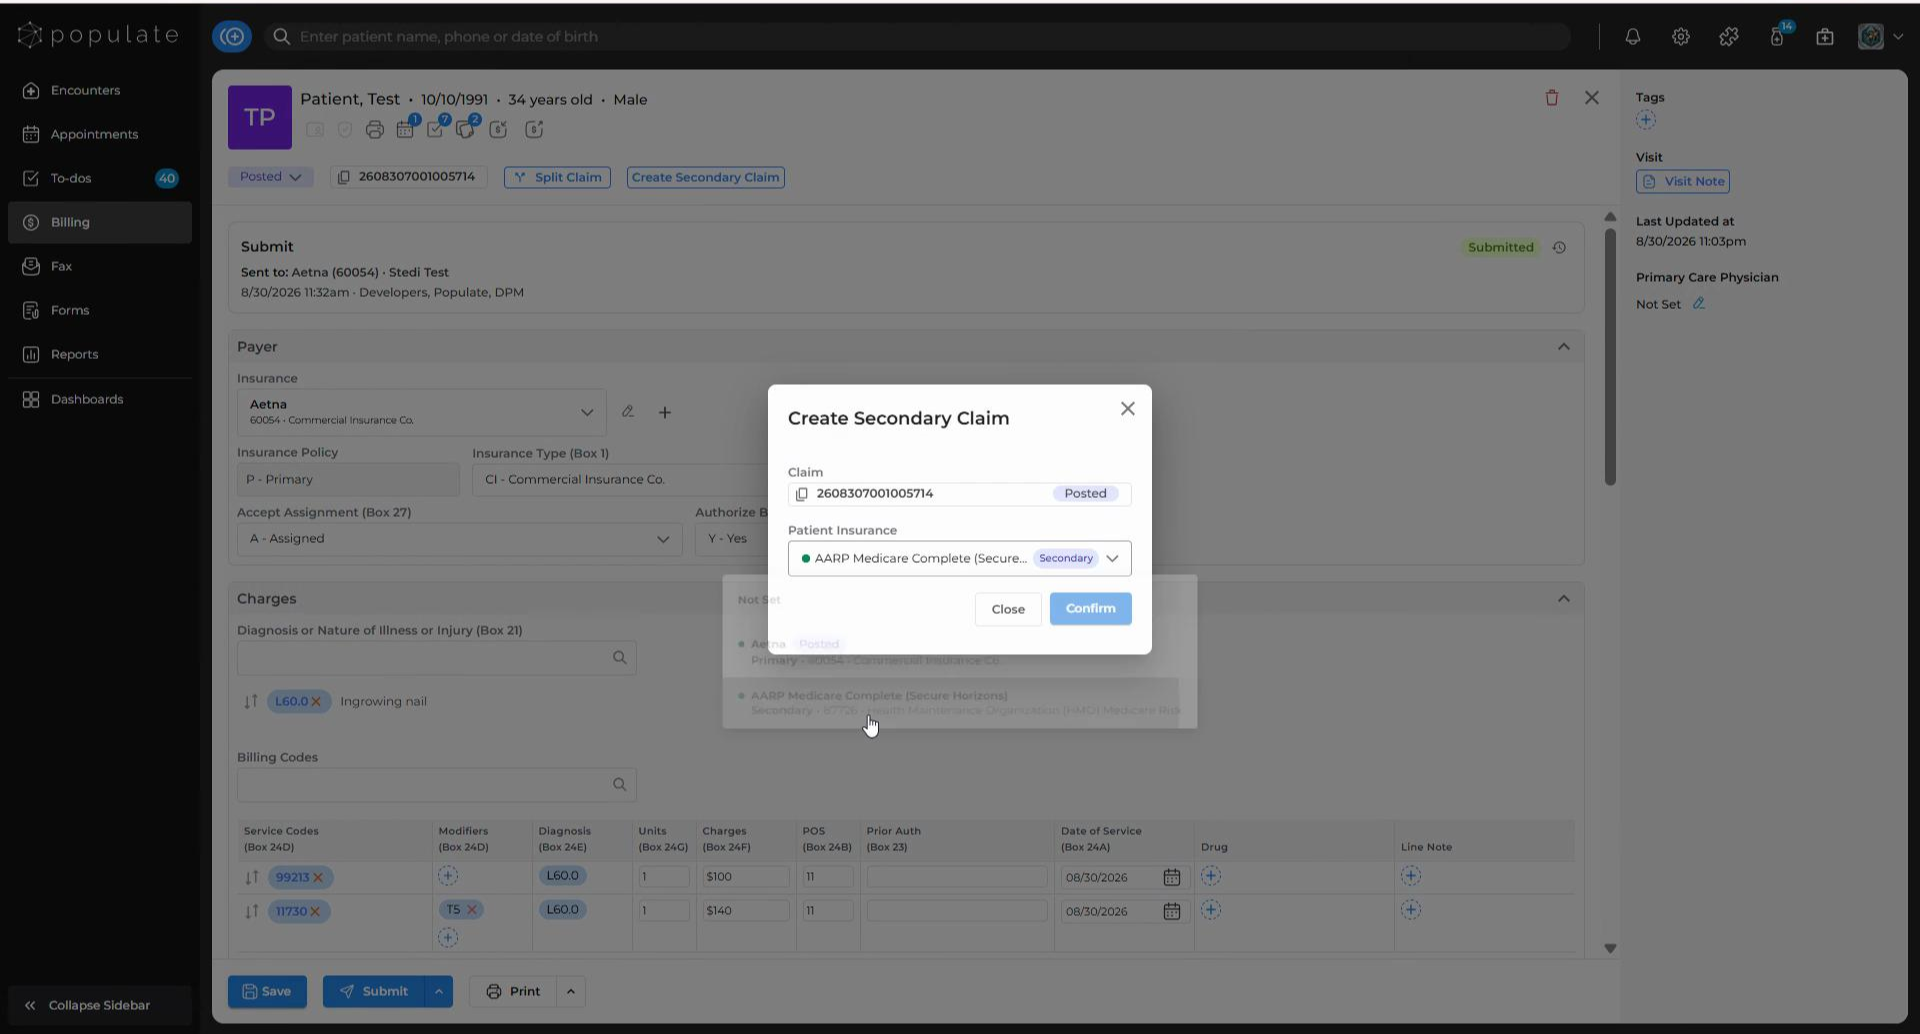
Alternatively, you can click on “Open Form” beside the “+Secondary Claim” option. Once the claim form page opens, click on “Create Secondary Claim” next to “Split Claim.”
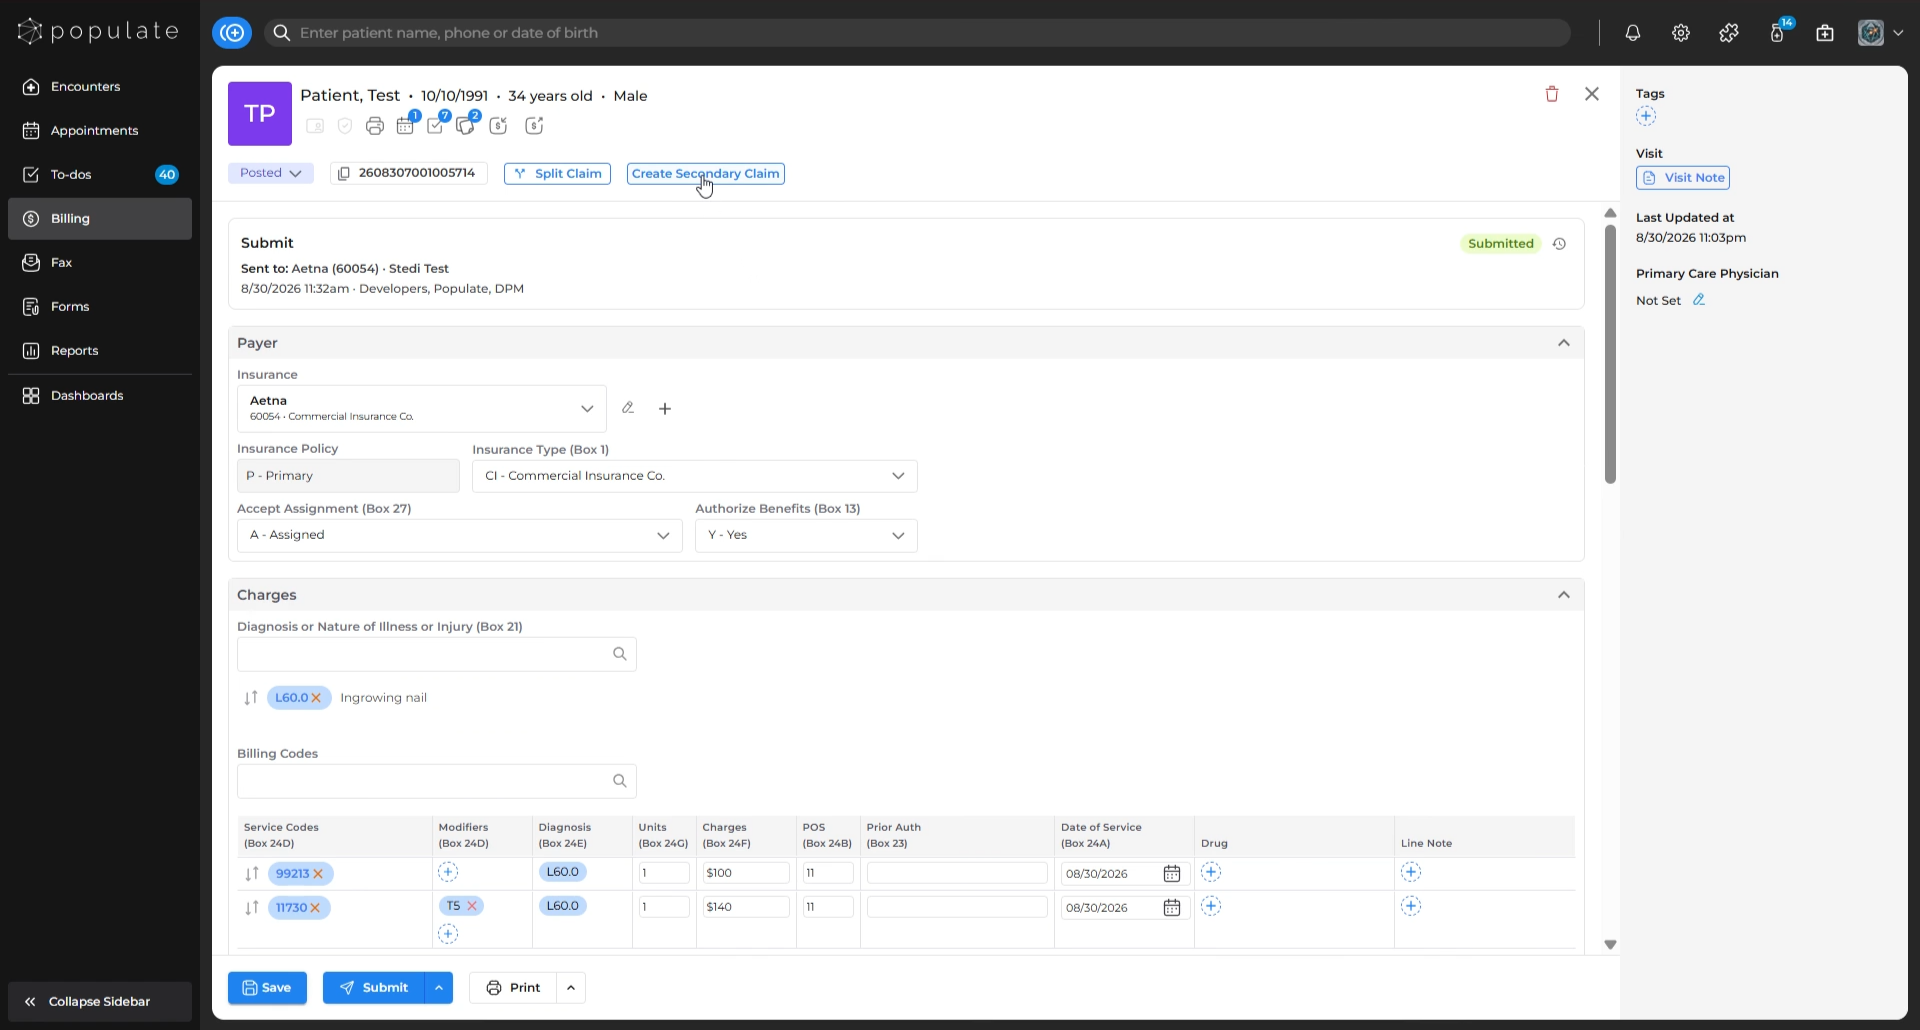
Select the desired insurance from the dropdown and click “Confirm”.
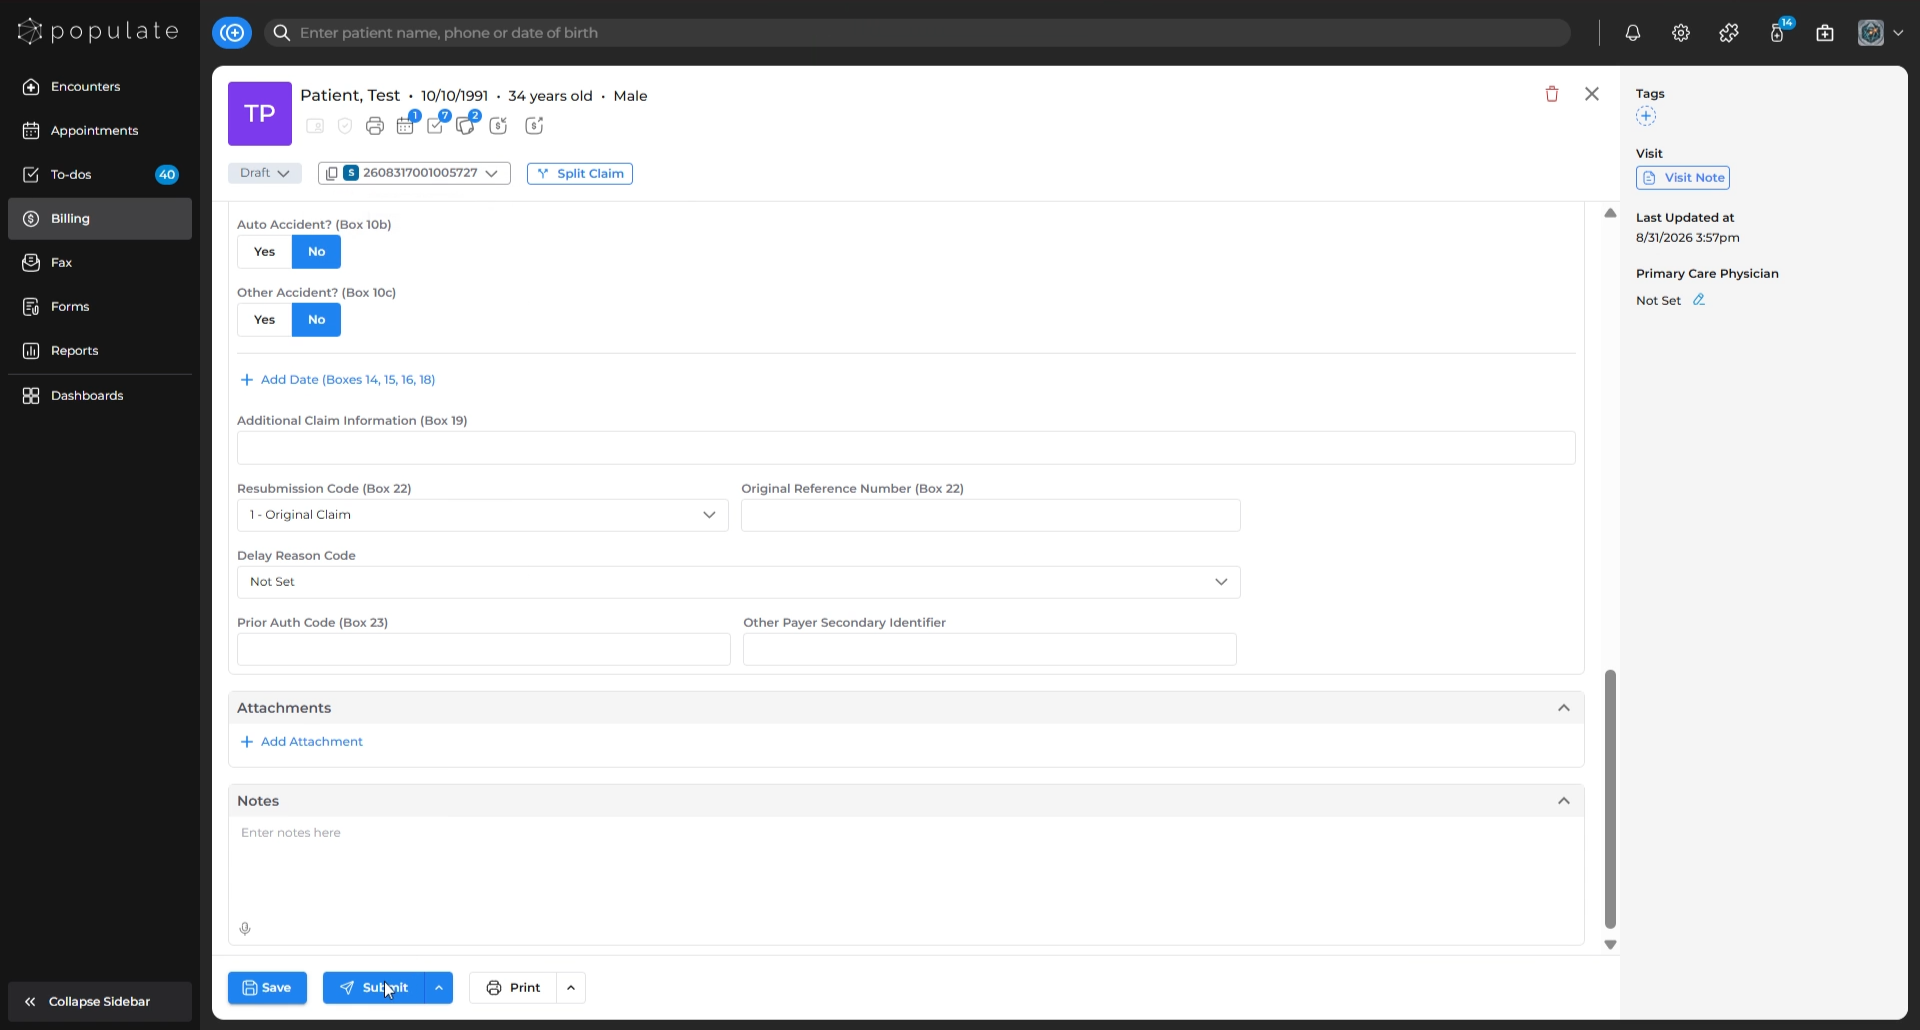
After creating the secondary claim, you can view it from the dropdown beside claim status on the claim form page.
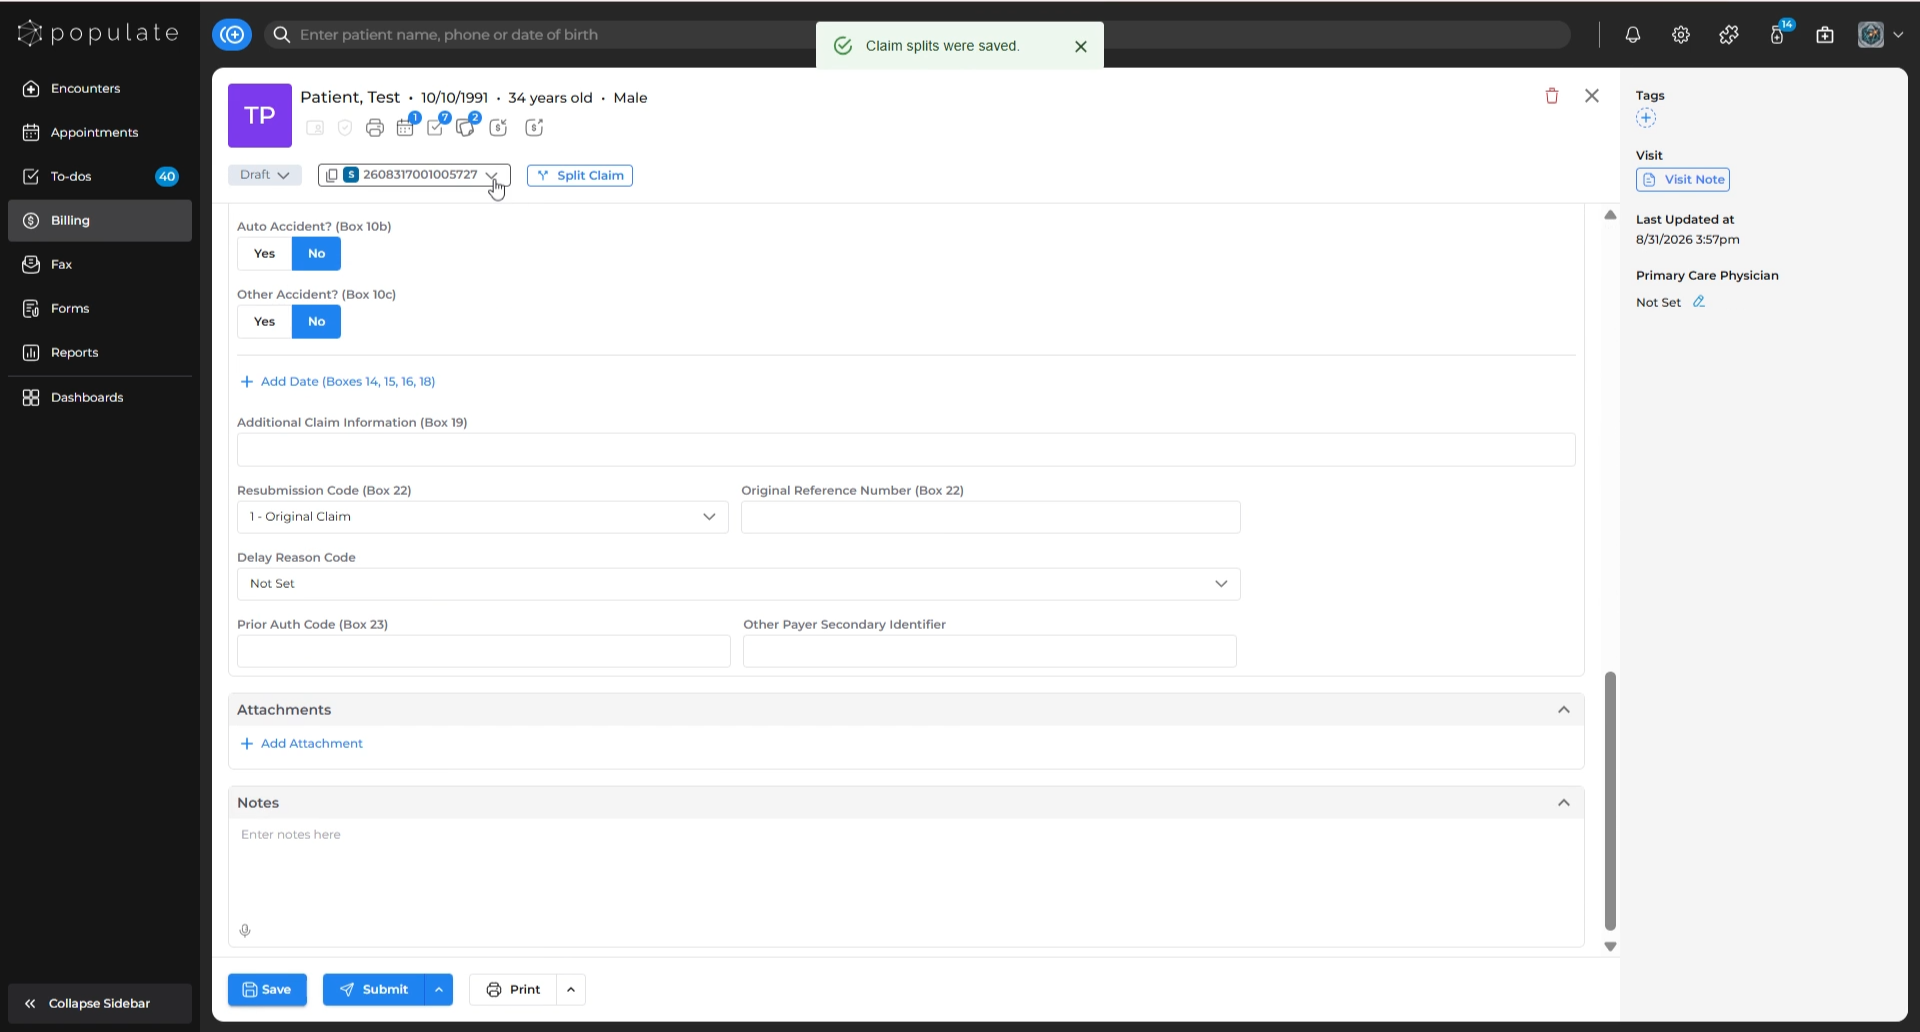
The letter tags in front of claim IDs will indicate whether the claim is primary or secondary. A tag with “P” denotes a primary claim, and “S” denotes a secondary claim.
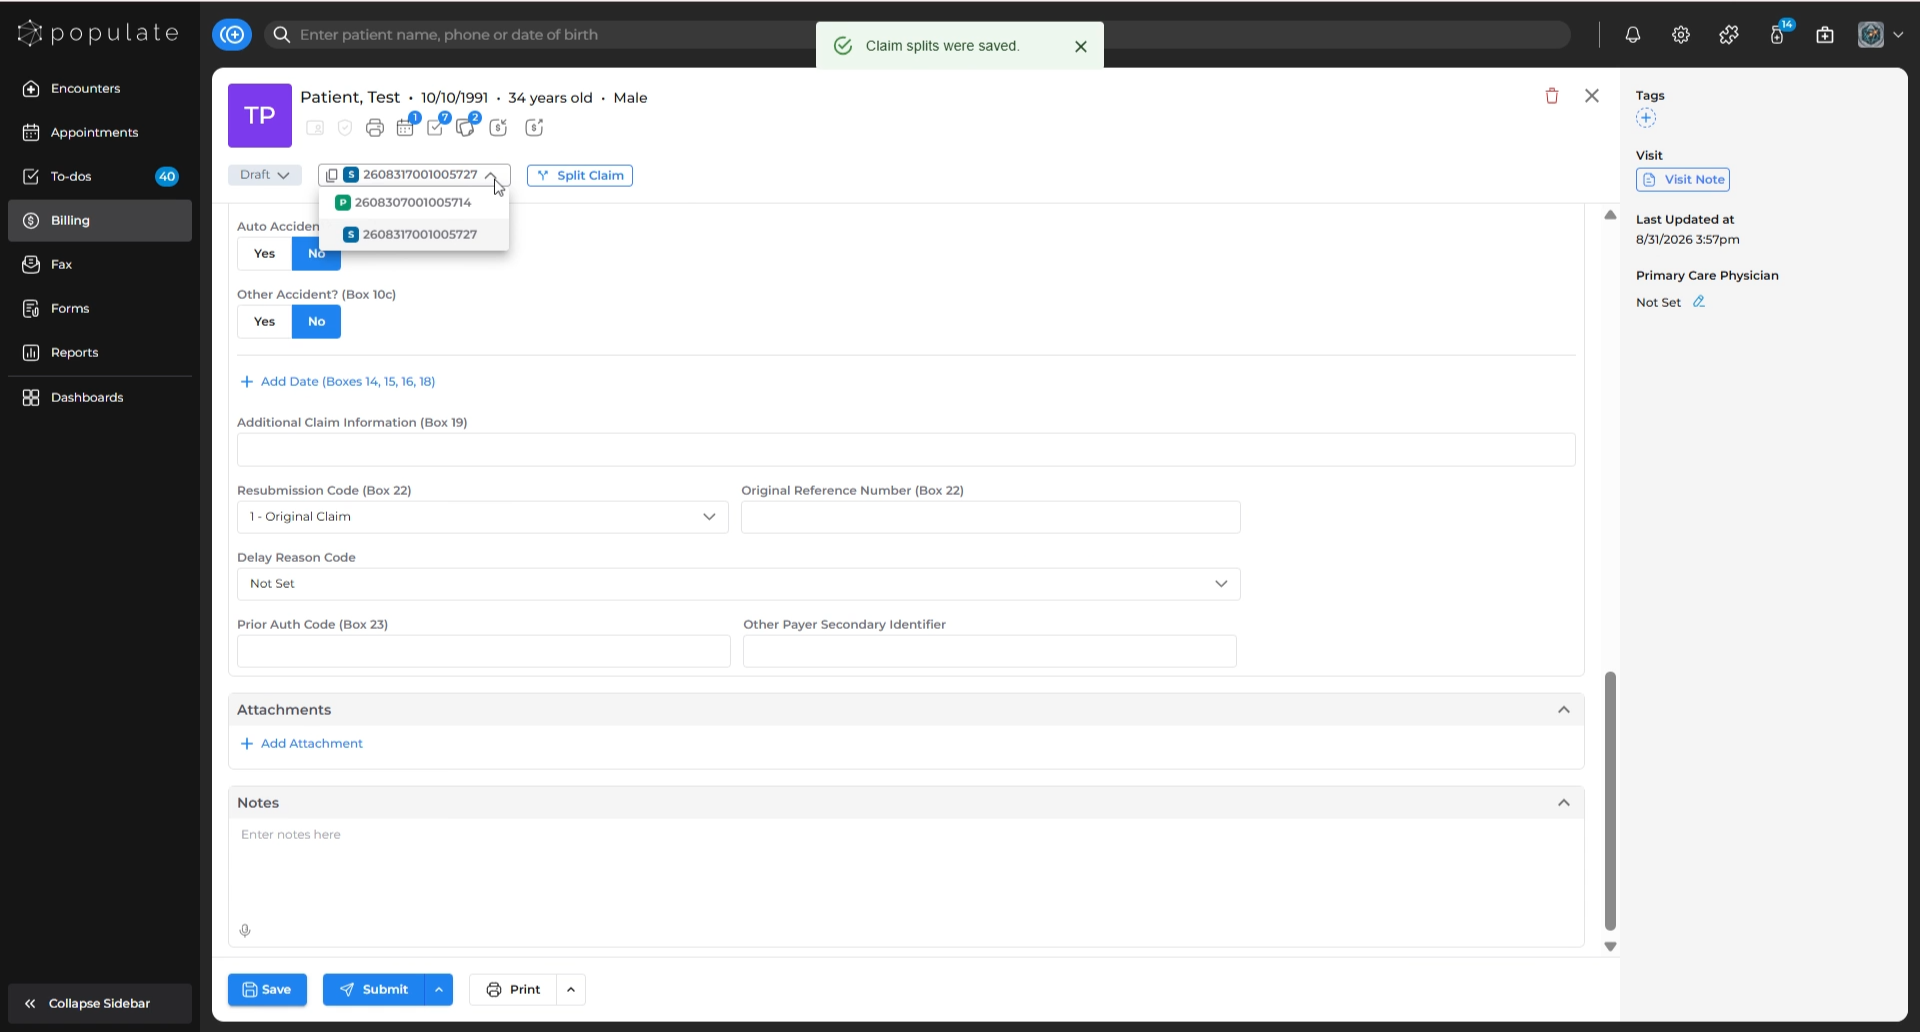
Once the secondary claim is created, it will be in draft status. You can verify the details, and when you are ready to submit the claim, simply click on “Submit” to send it for processing. Once submitted the claim status will change from "Draft" to "Submitted".
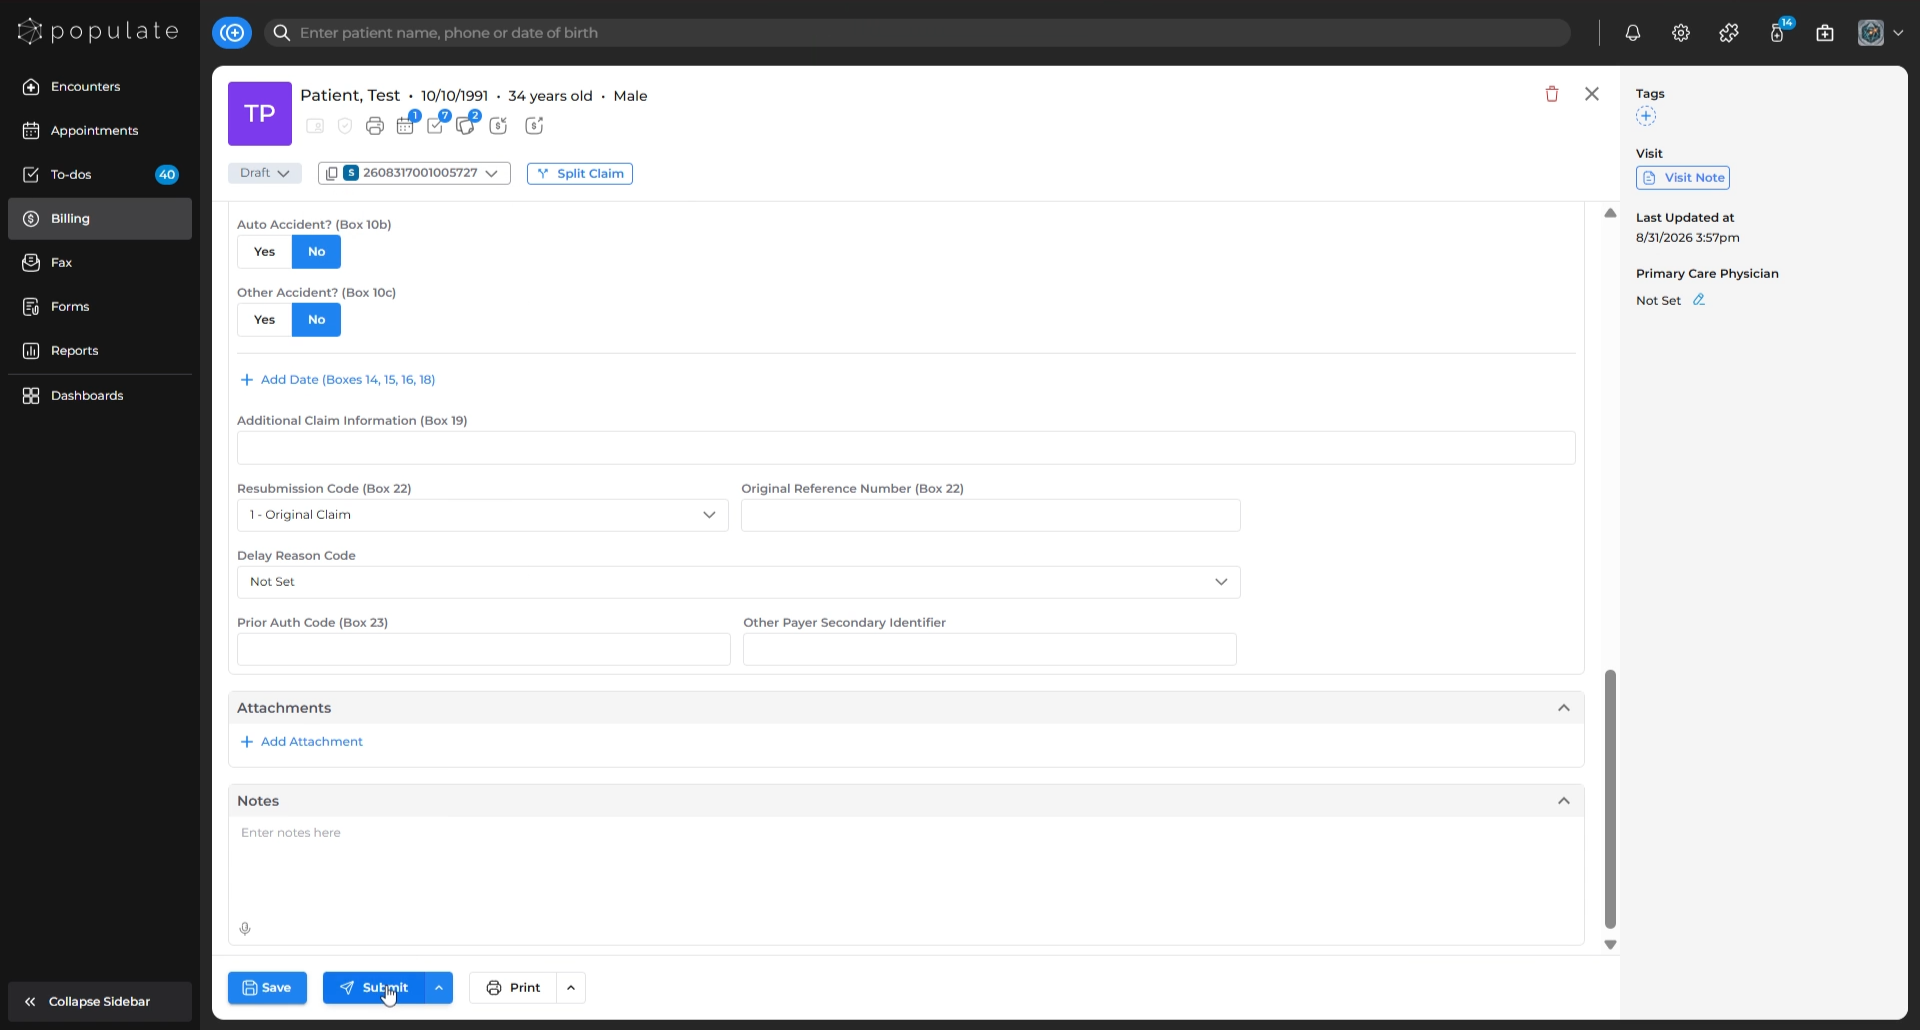
To delete a claim, go to the claim details page and click the “Delete” icon at the top right corner of the page. Alternatively, you can delete it from the bottom right corner (next to "+Secondary Claim" button) of the charges side panel page.